
Install WSA ( Windows Subsystem For Android )
We need to install a modified version of windows subsystem for android in which root access is enabled by default.
Install Windows Subsystem For Android mod from MustardChef on github.
Follow the instructions from the github repo.
Tip 💡: Download a build with
magiskenabled an notkernelsu. We need magisk for LSposed and Pixelify-Google-Photos
⚠️⚠️ “Microsoft is ending support for the Windows Subsystem for Android™️ (WSA). As a result, the Amazon Appstore on Windows and all applications and games dependent on WSA will no longer be supported beginning March 5, 2025.” ⚠️⚠️
I installed and tested some versions of WSA and Version
2306.40000.4.0worked best and without any issues. But feel free to experiment with newer versions.
Setup LSposed and Pixelify-Google-Photos
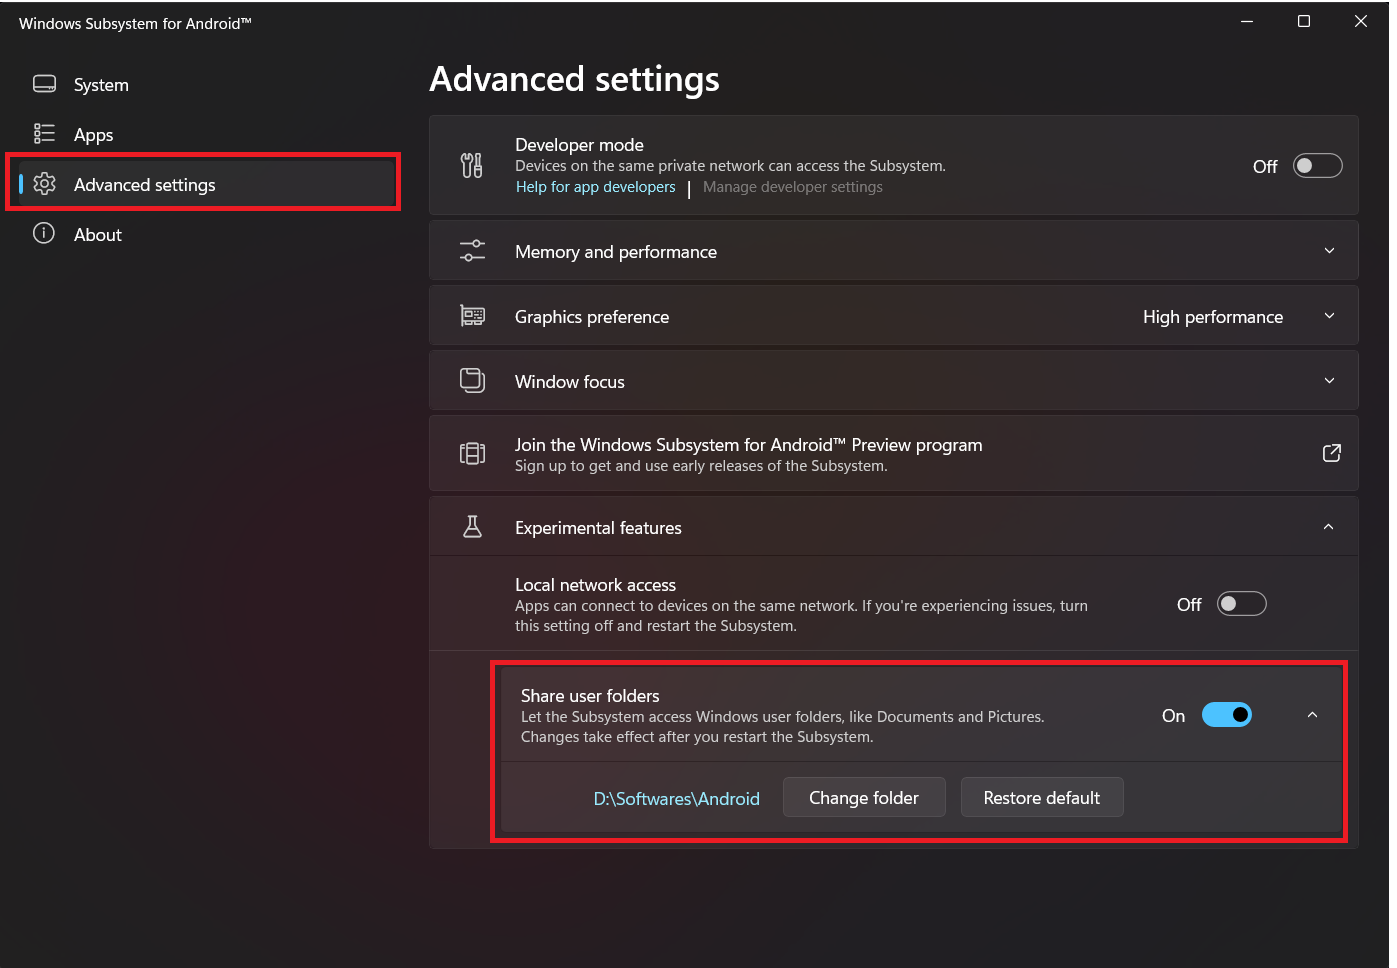
- After successfully installing WSA, open the additional settings in the app, and then turn on the
Share user foldersunder the Experimental features tab and set the folder you want to share with WSA.
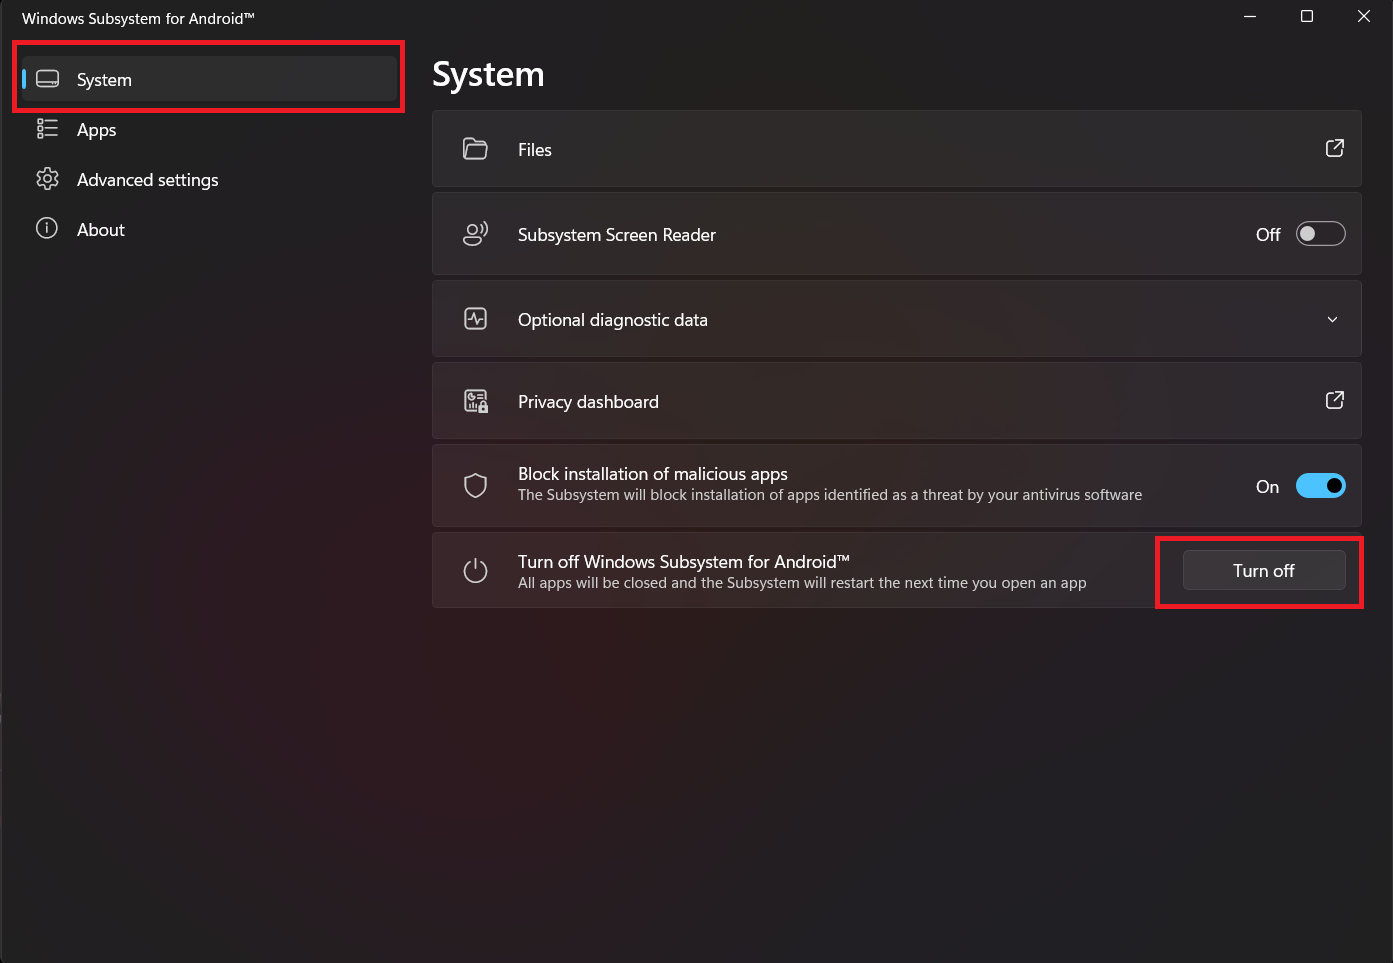
- After that
turn offthe subsystem by coming to the system tab and clicking the turn off button.
Close the app and reopen it.
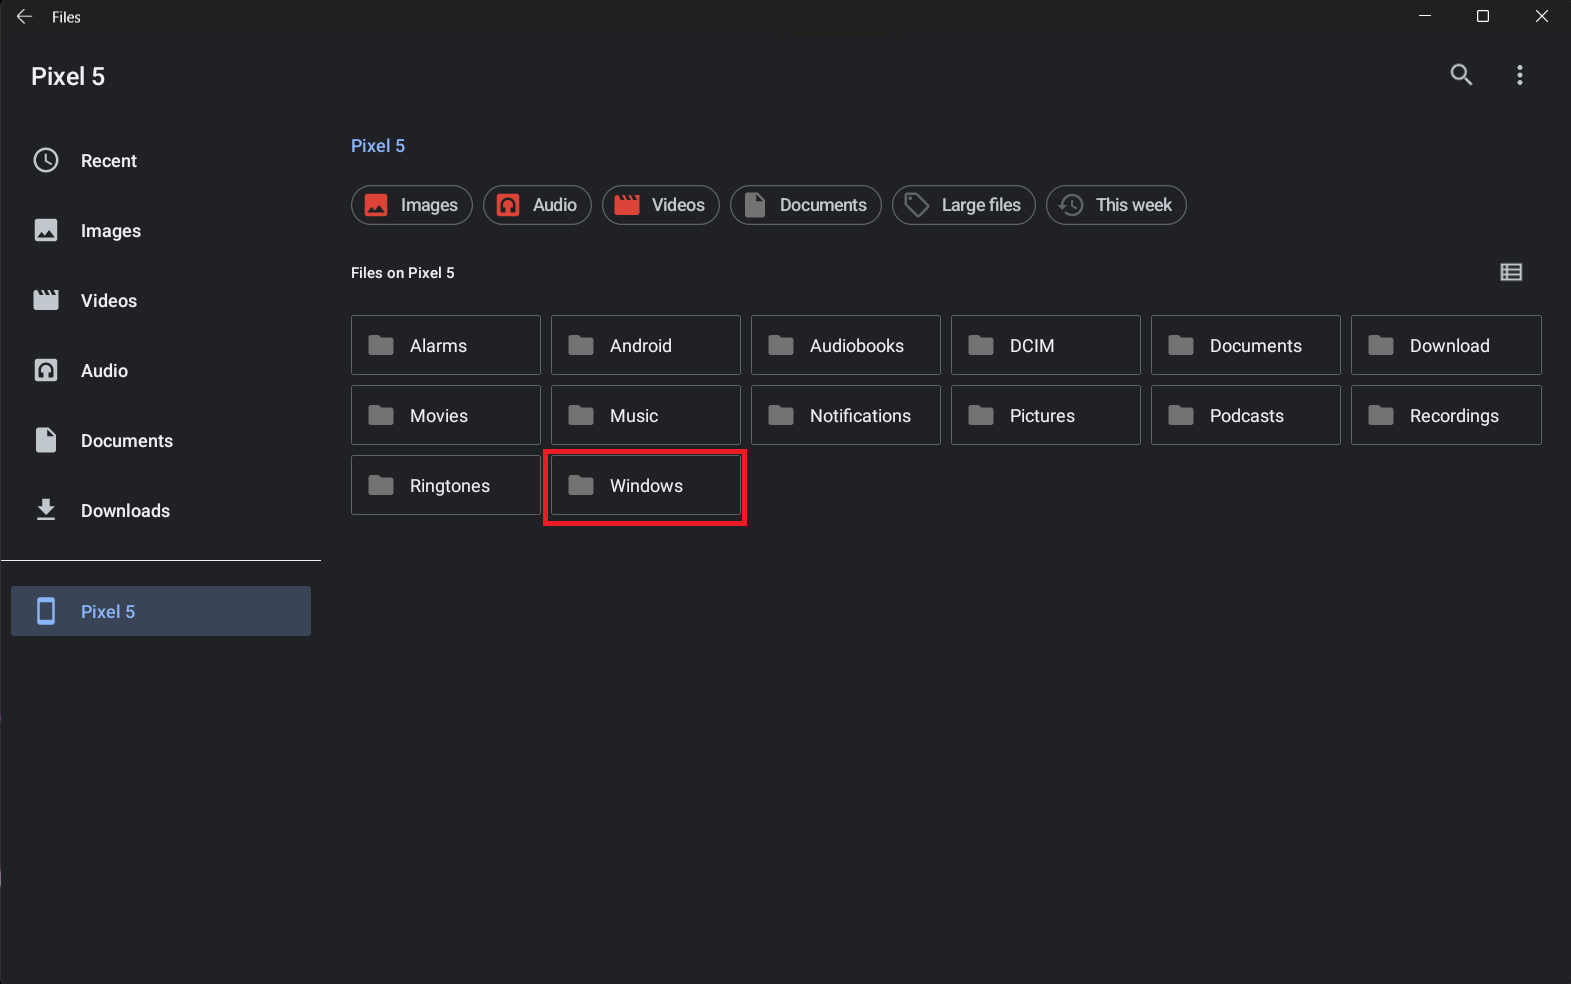
Download and keep LSposed and Pixelify-Google-Photos in your WSA share folder that we setup earlier.
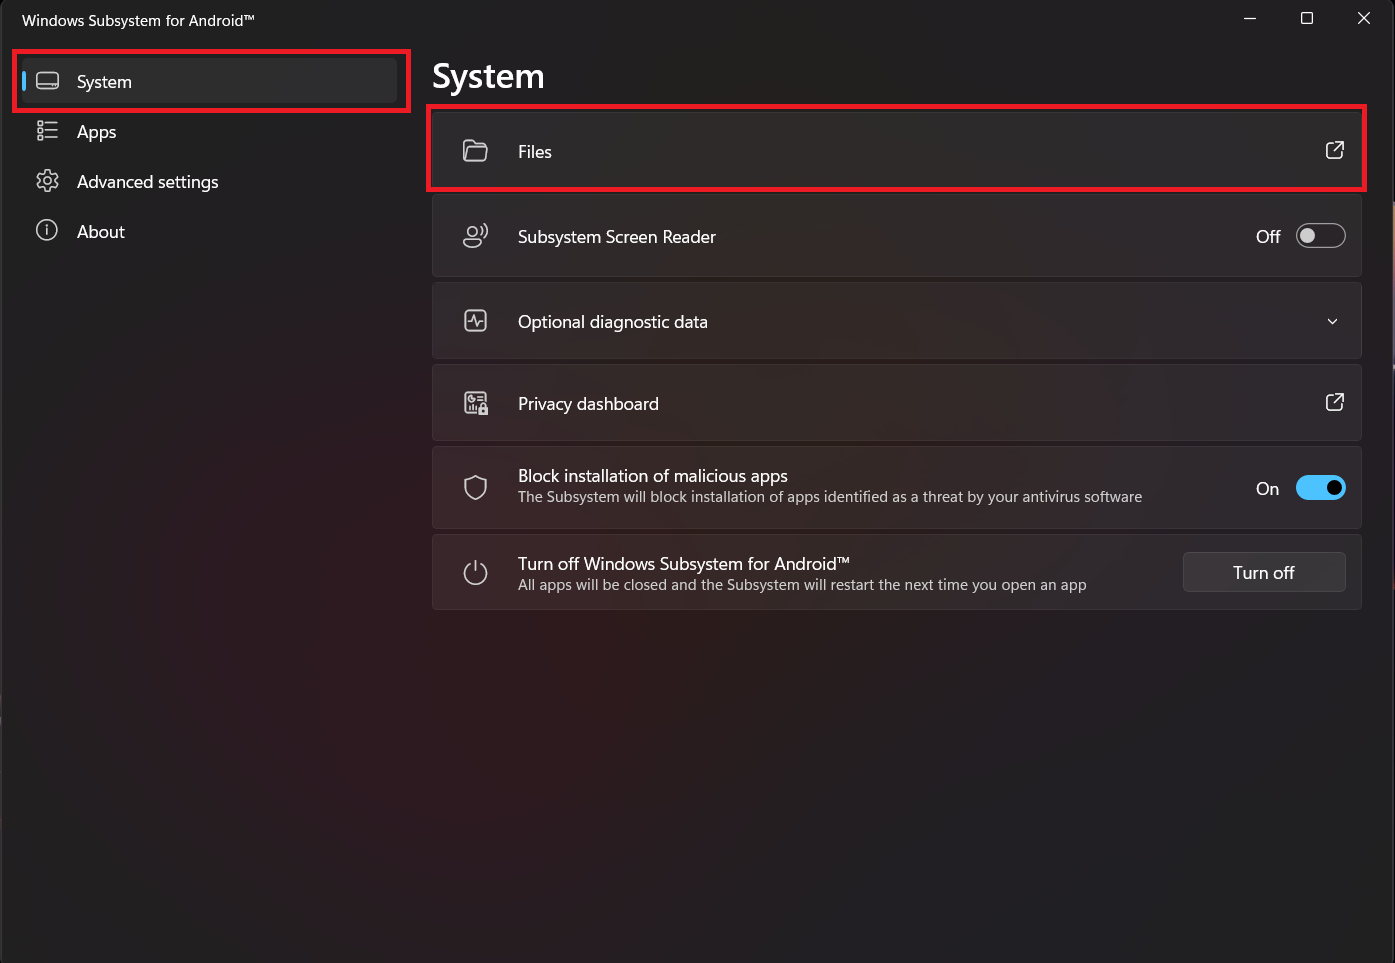
Open the files app.
- Your Shared Folder will be located in a folder named Windows.
Make sure that magisk is installed. Otherwise install by downloading the apk.
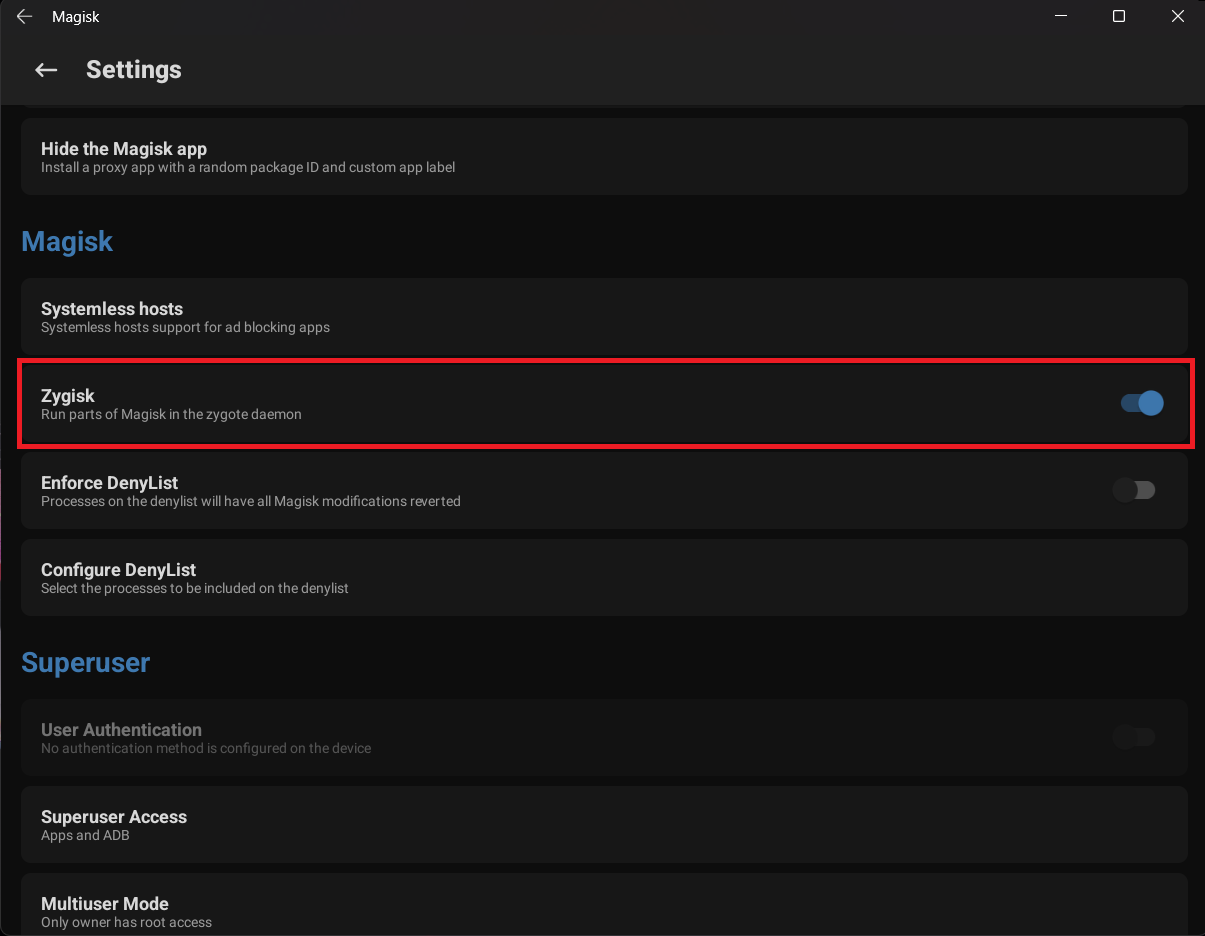
- Then open the magisk app and head over to the settings and turn on
Zygisk.
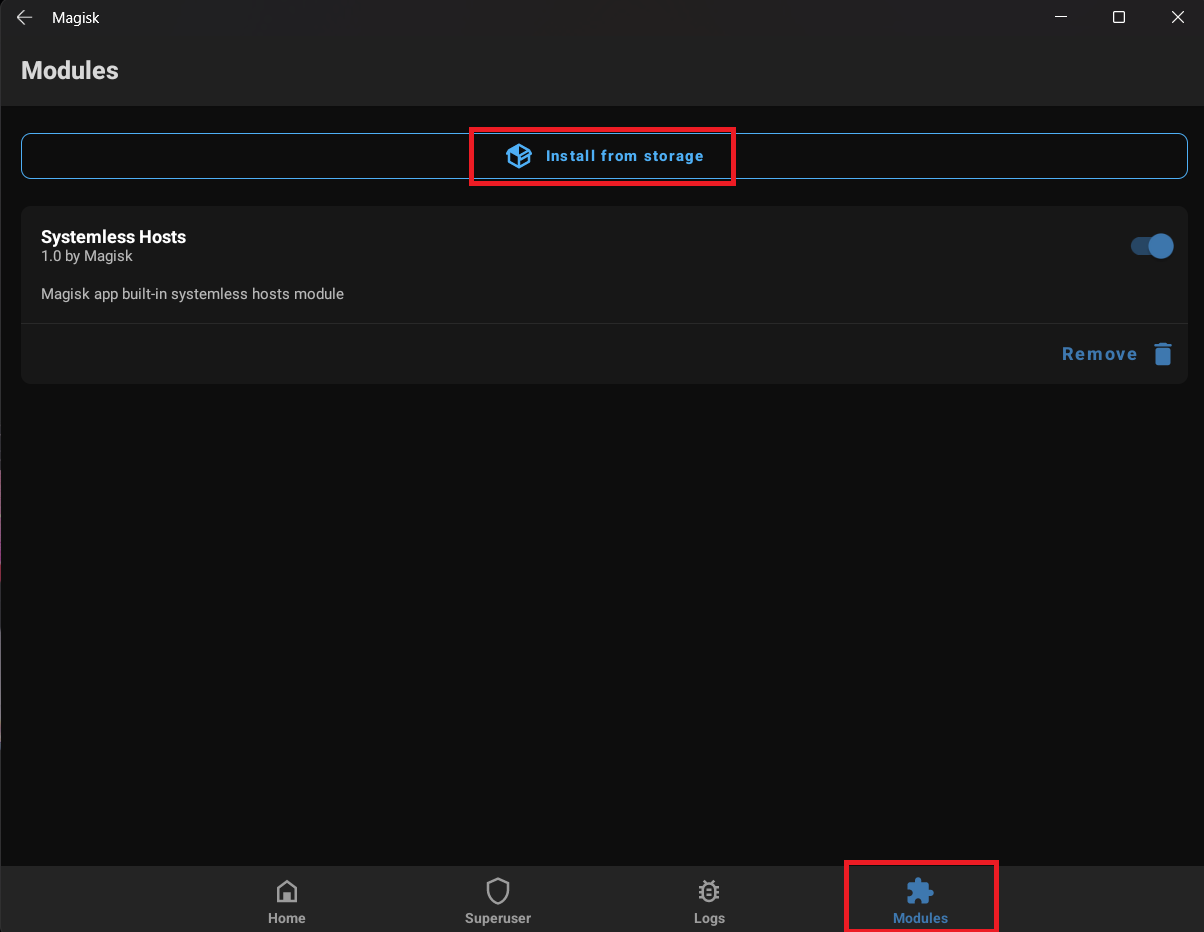
- Then come back to the home page and go to the modules tab. Click on
Install from storage.
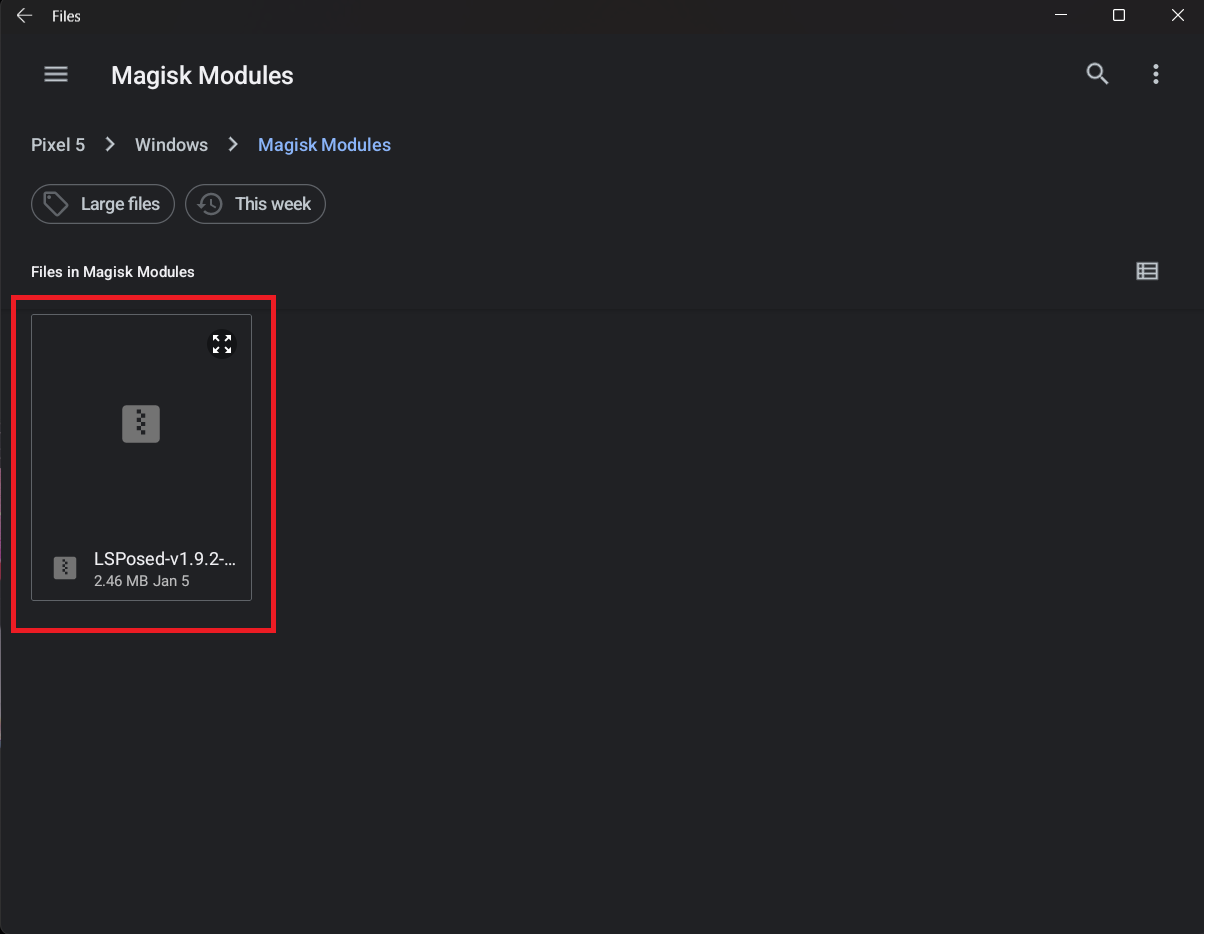
- Locate the LSposed
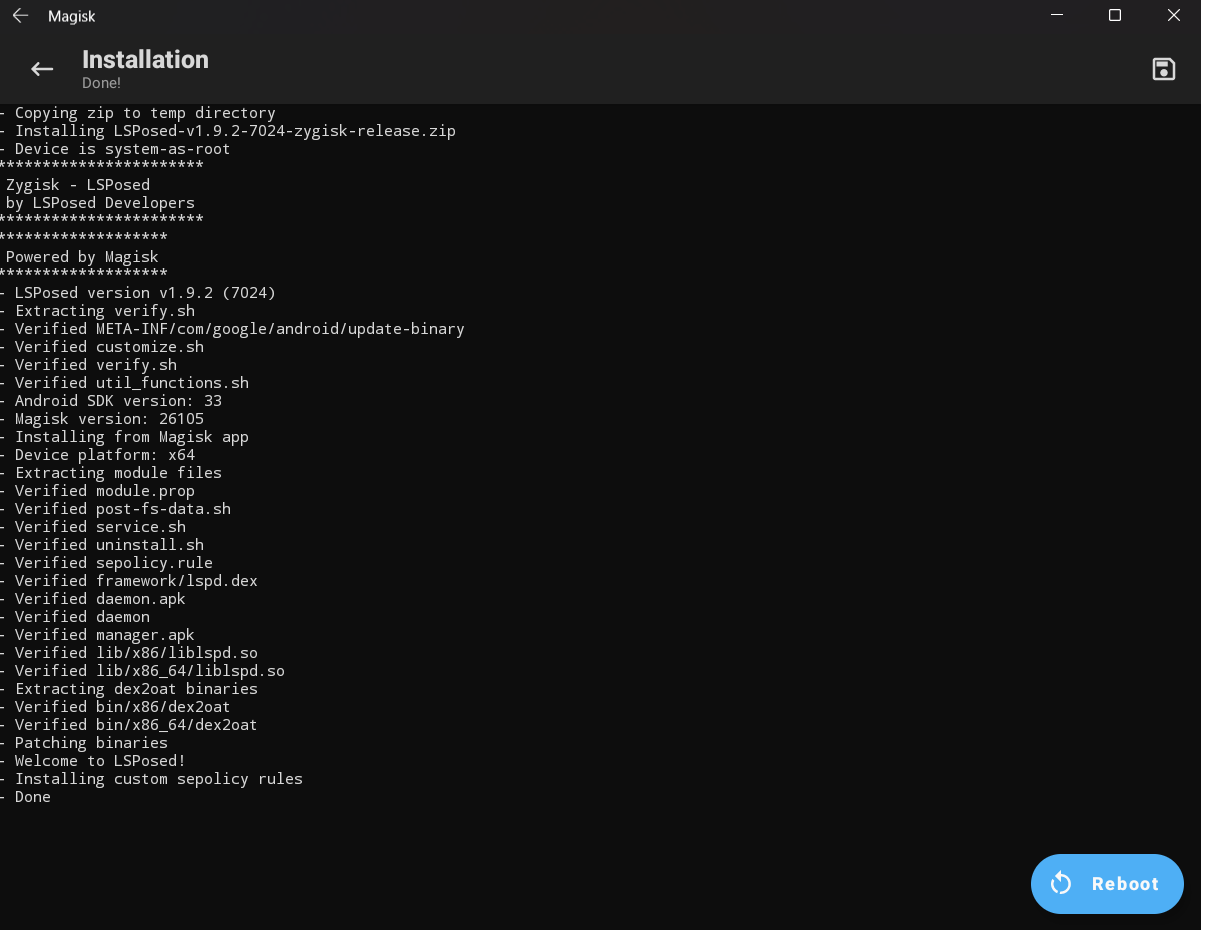
zipfile that we downloaded earlier. Double click and install the package.
- Reboot WSA.
You can download LSposed app from the play store to manage the LSposed modules.
- Install the Pixelify-Google-Photos apk from files app.
After installing the apk, open the LSposed manager app, and head over to the modules tab.
Click on the Pixelify app.
- Enable the module.
Close the manager app. (Might need to restart WSA)
Install Google Photos app from the play store.
Open the Pixelify GPhotos app.
Change the
Device to Spoofto Pixel XL (for best results)Click the
Force Stop Google PhotosButton.
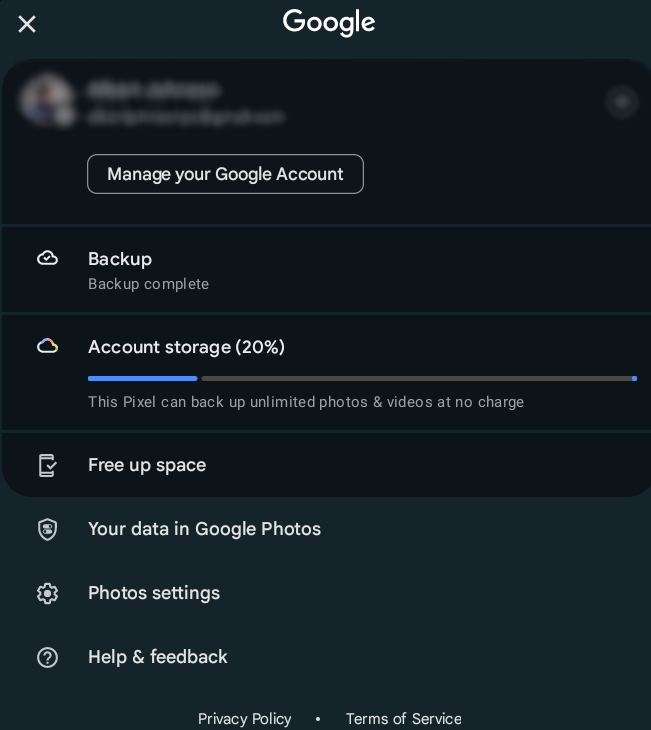
- After that open the Photos app.
- Head over to the settings and check the account storage section.
- If you see
This Pixel can backup unlimited photos and videos at no charge, congratulations !!! 🎉🎉🥳 We made it happen 🥹. - If not, try again 😁. I know you can do this 💪.
Was that too long !! 🤷♂️
Troubleshooting ⚙️
Uploading seems stuck for a long time ?
- Restart WSA and open Google Photos app again, that might fix it.